State Information Tab
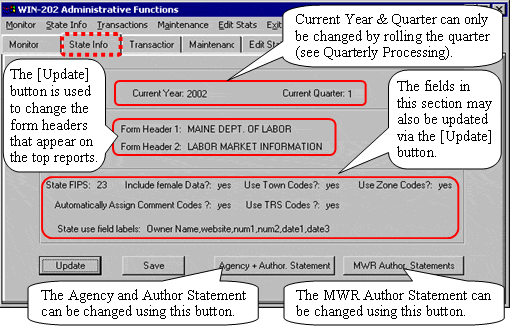
The State Information Tab displays the State’s data. With certain privileges one can click on the "State Info" tab to modify options.
To Update Data:
- Click [Update]
- Click on the field desired and enter changes
- Click [Save]
Note: A user can specify labels to go along with state use fields (i.e., fields created especially for the state to enter information not captured in the WIN-202 system). State Use data is displayed via the State Use tab (see Chapter 3 Screens). State use field labels initially display as "Owner Name", "char2", "num1", "num2", "date1" and "date3". For example, to modify "Owner Name" highlight the text and type your choice leaving the commas intact.

Agency & Authorization Statement & MWR Statement
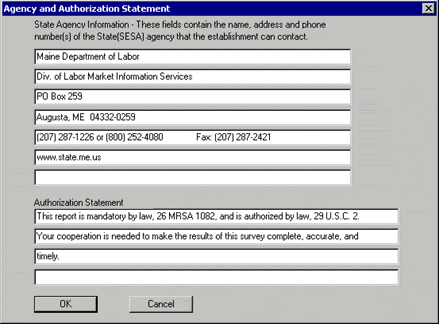
Click the [Agency + Author Statement] button from the "State Info" tab to enter state-specific information that will print on ARCS forms. You can edit the address, phone number, fax number and web site address along with the authorization statement for the Annual Refiling Survey. Click [OK] to save changes otherwise, click [Cancel].

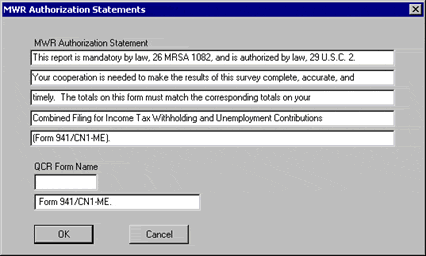
Click the [MWR Author Statements] button from the "State Info" tab to enter state-specific information that will print on MWR forms. To save changes click the [OK] button otherwise, click the [Cancel] button.

Transactions Tab
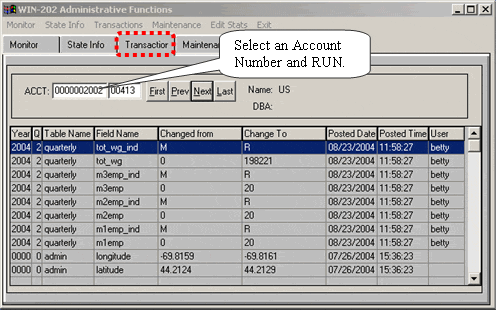
The WIN-202 system is transaction based. This means that all changes (additions, updates and deletions) are captured and stored until their removal. Click on the "Transactions" tab to view changes made to individual accounts by user(s). You may select accounts to view by entering an Account Number and RUN or by using the First, Prev, Next, and Last buttons.
In the below figure, the transaction highlighted occurred in the 2nd quarter of 2004 by user "Betty" on 8/23/2004 at 11:58.27. The Total Wages Indicator in the quarterly table on the database was changed from M to R.

Note: Additions, updates or deletions to an account cannot be made using this screen. These transactions are discussed in the "Data Entry" and "Screens" portions of this manual. Removal of transactions stored in the database are not permitted using this screen.
