Elevation Discovery Application Help - Introduction and Map Navigation
The Elevation Data Discovery and Download application allows the user to search, discover, filter and download MEGIS LiDAR data. Data can be downloaded in a number of different formats.
NOTE: This application is NOT intended for visualization of data, it is intended for data discovery and downloading. As such, imagery will not be displayed on the screen when zoomed beyond its native resolution.
Notice:June 5, 2020: The Elevation Discovery and Download Application (https://www.maine.gov/geolib/ediscovery/site/index.html) issue has been identified and the Maine Office of GIS is pursuing options to improve the function of the application. At this time, users are able to download data with the application. The Maine Office of GIS has found that data downloads in the Elevation application will not always work if the selected tiles involve overlapping data, and occasionally will fail in instances where the original source data is in Esri Grid format. If a user query result returns null data or a limited subset of data in .zip file format, the user should individually download the tiles required.
This documentation includes several pages grouped by topics:
- Map Navigation
- Tools
- Data Search and Download
Map Navigation
Basic navigation functionality is provided to allow the user to move around the map. The application will open with a statewide map view. This includes zoom in/out controls, and previous extent/next extent/full extent on the upper left corner of the map:

The map can be panned by clicking with a mouse and dragging to a new location. If equipped with a mouse wheel, the map can be zoomed in and out by rotating the wheel.
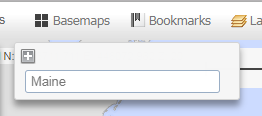
Find and Zoom to a Location
A named location can be navigated to by using the Enter a Location tool. On the middle of the toolbar:
![]()
Enter a Location where indicated. The map will zoom to that location. This can be a street address, town name, or similar named location:
![]()
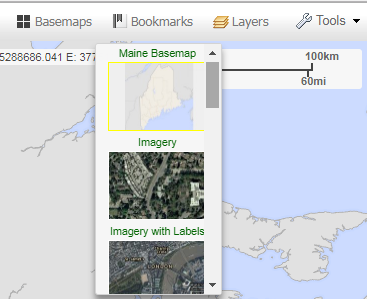
Basemaps
The basemap displayed in the background can be changed by clicking the Basemaps button, then selecting the desired basemap:
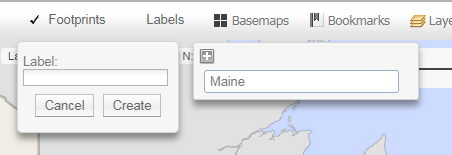
Bookmarks
A Bookmark tool is provided on the toolbar. Users can select existing bookmarks, and create their own, to allow zooming to those locations. To zoom the map to a previously bookmarked location, click the Bookmarks button on the toolbar, then click on a bookmark to zoom to it:
To add a new bookmark, first make sure the map is zoomed to the location of interest. Open the Bookmarks tab if necessary, and click the + button on the upper left of the Bookmarks tab. Type the name of your bookmark in the Label field and click Create. To remove a bookmark, click the ? button on the right end of that bookmark.
Labels
Some of the basemaps do not have labels. Use the Labels button to toggle label display: 
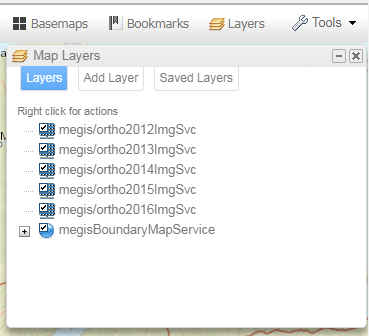
Layers
Map layers can be turned on and off using the Layers dialog. Click the Layers button on the toolbar to open the dialog box. Make sure the Layers tab is selected. Layers can be turned on and off by checking or unchecking:
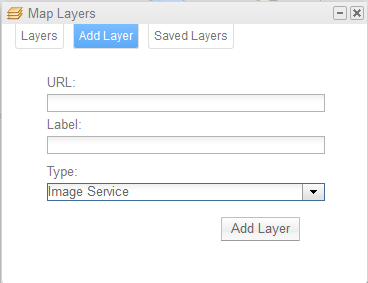
It is also possible to add a reference layer to the map, if it is available as a service. Click the Add Layer tab on the Map Layers tool, enter the URL to the reference layer, enter a label of your choice, and select the type of layer (Image, Map, Feature or KML) from the Type list:
Added layers can also be removed by clicking the Saved Layers tab. Click the - sign to the left of a layer to remove it, or click the Clear Entries link to remove all added layers.