Manufacture Application Knowledge Effort - Grades 5 through 14
We build through our EFFORT to show we gained KNOWLEDGE that we then MANUFACTURE through APPLICATION.
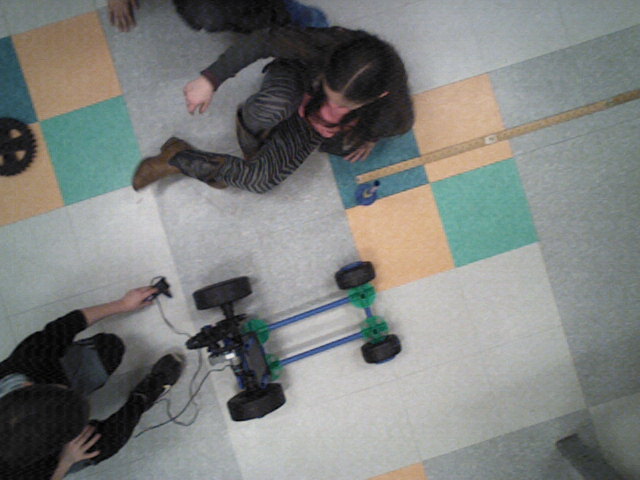
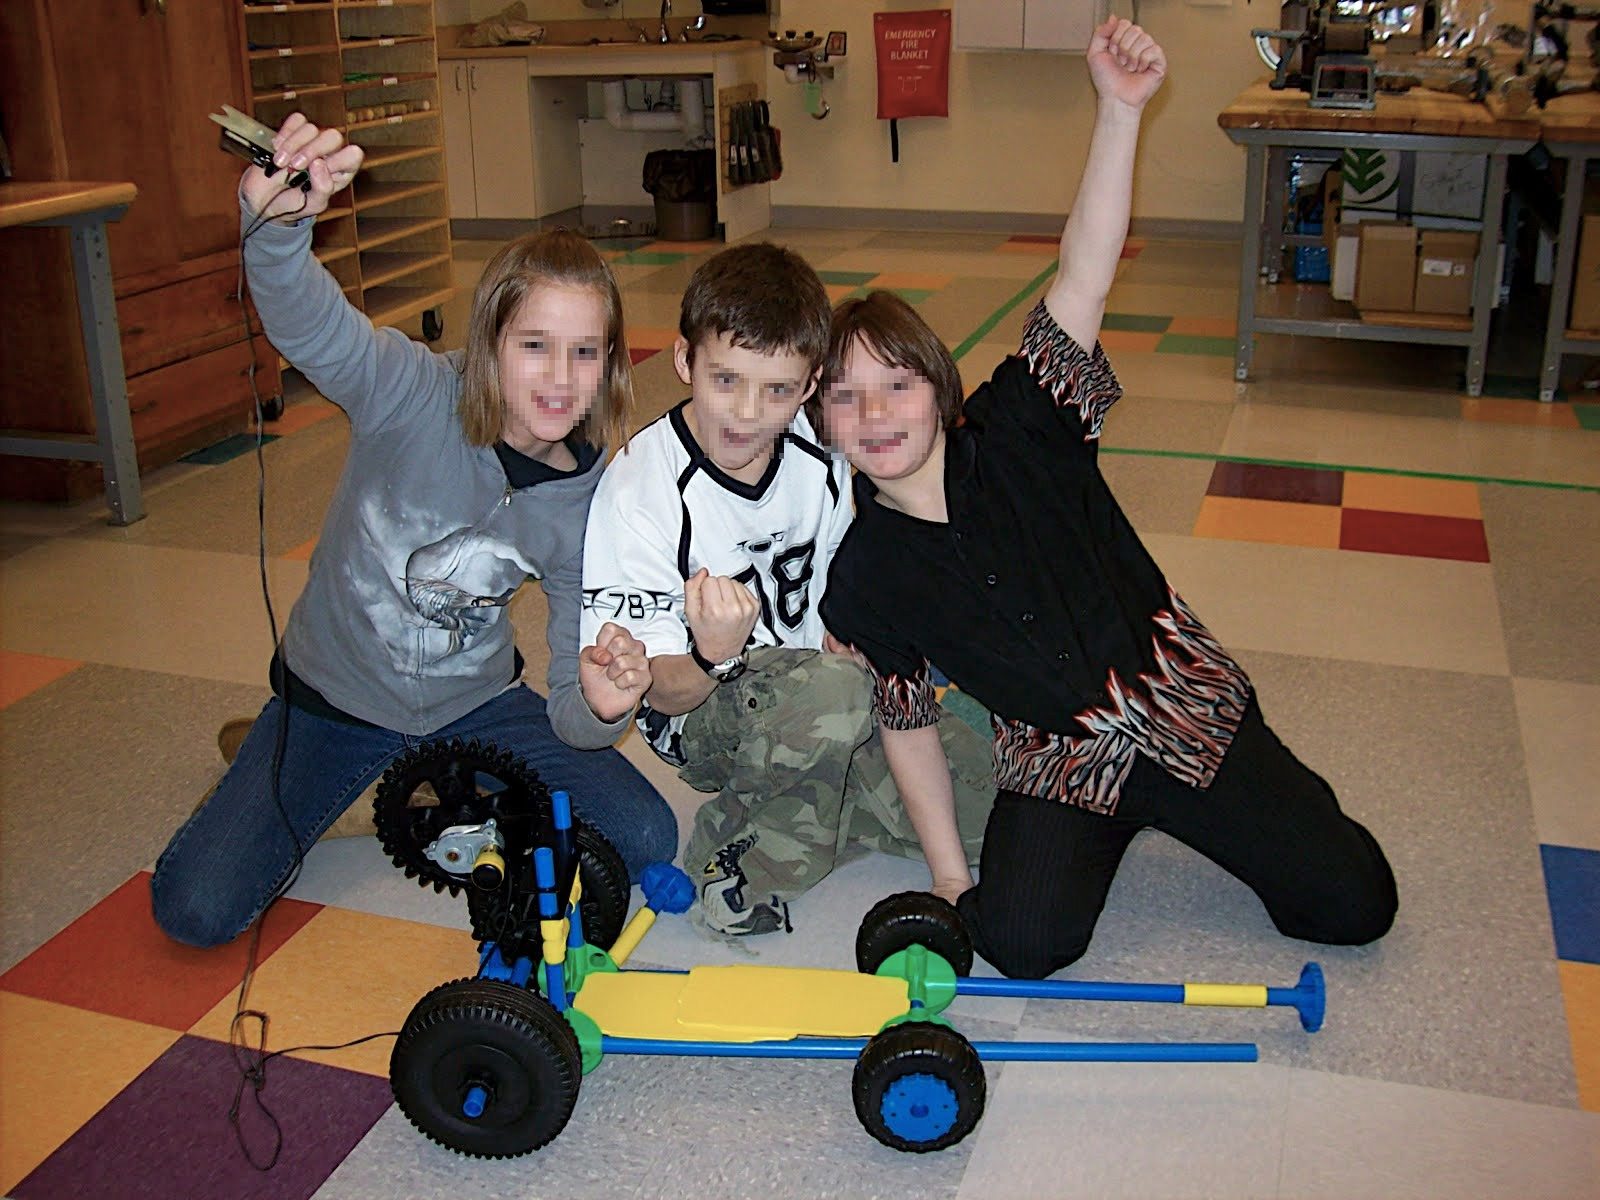
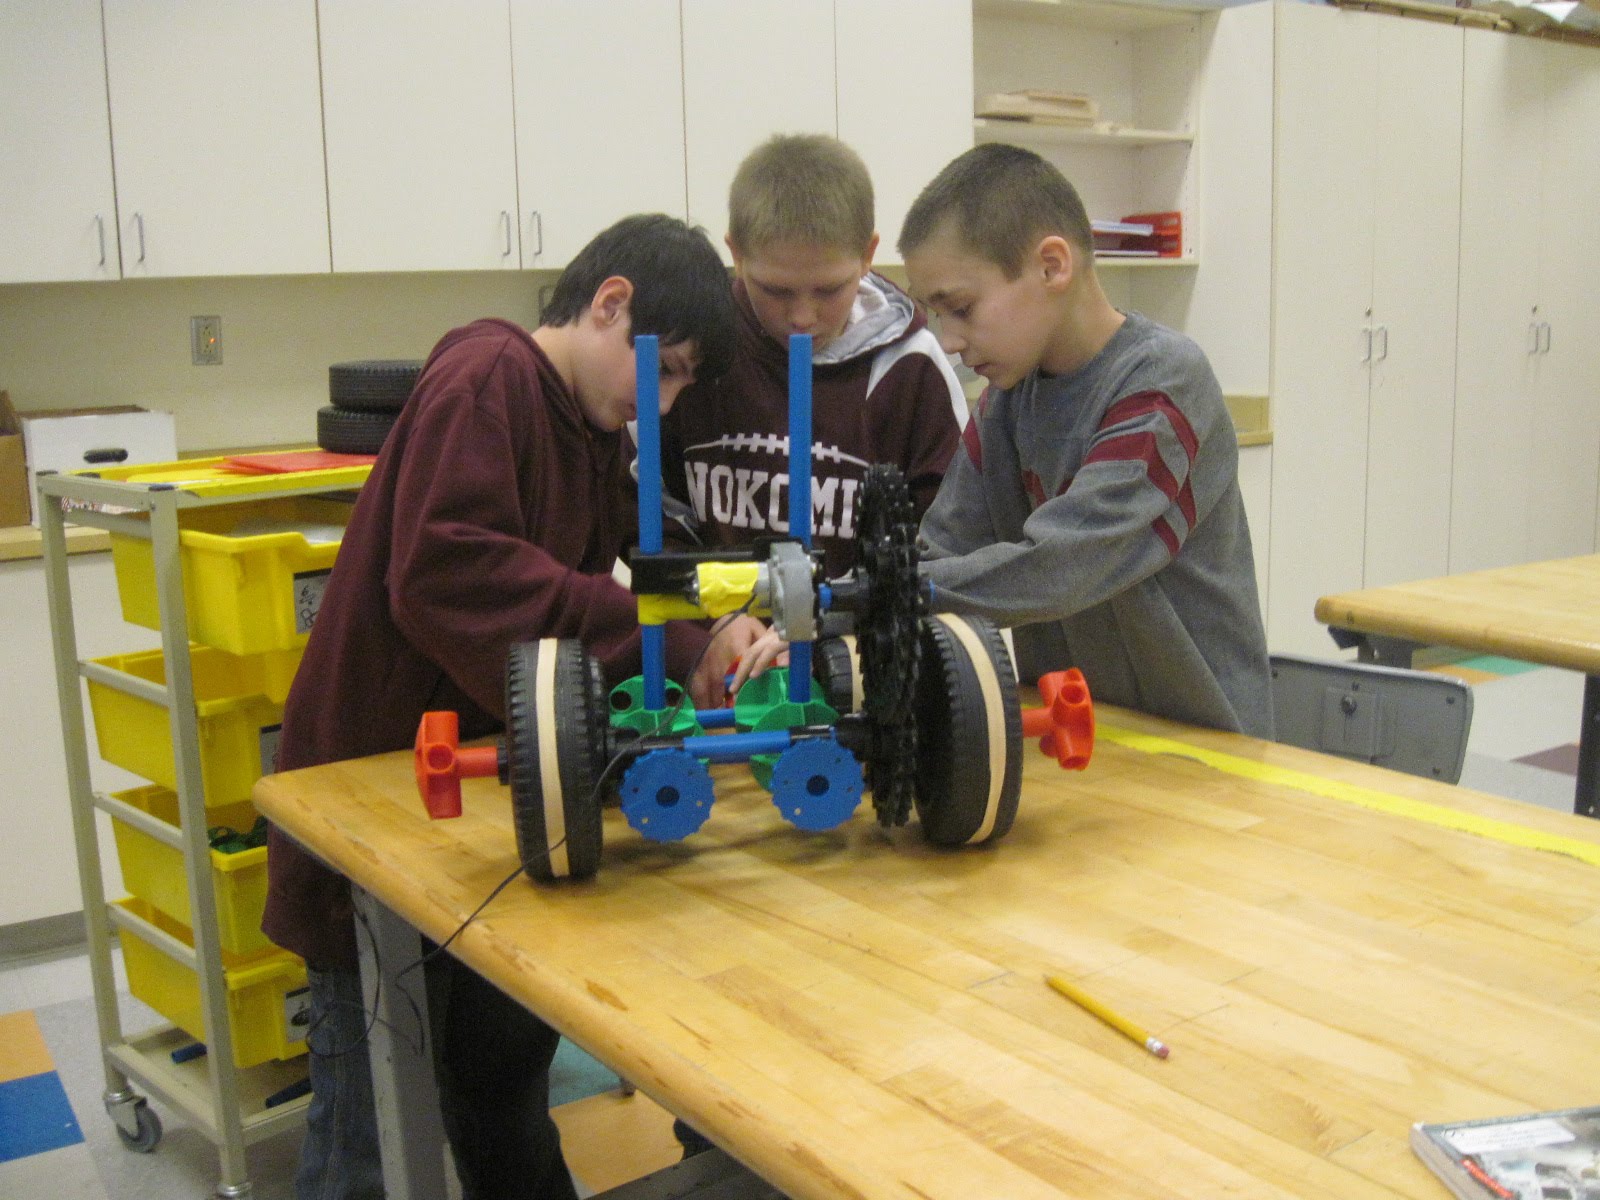
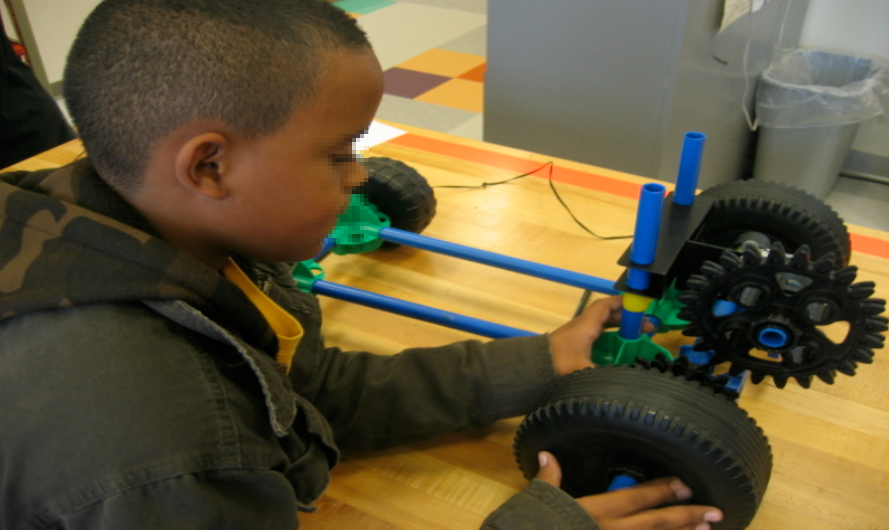
For example, my students build a car after they have tested gear ratios, pulling forces (newtons), traction, and friction. They apply that knowledge by competing in races to see who can build the fastest and slowest car. As they progress to older grades they revisit previous projects to redesign or reverse engineer the products they did previously. They add value to existing products and add consequences where tolerances and outcomes matter. It is a continuum of Essential Skills.
Growth CTE fits these areas, focusing on process not on the product created.
- Learn from Success
- Learn from Failure
- Learn from Challenges
- Learn from Necessity
- Learn from Consequences
- Learn from Consumer
Each area will teach a mixture of Liquid Skills, also called Transferable Skills as well as Concrete Skills specific to the subject/trade. While participating students will gain, Career Awareness, be given chance for Career Exploration, finally being their own personal Career Experimentation.
This sections will always look for how these skills / content are connected to other subject areas
(Math, Science, Social Studies, Language Arts, PE, Art, Health)
MAKE is not a separate subject, but one that uses all disciplines to produce and create.
This video will help give an overview of the concept. https://vimeo.com/221298814
Learn from Success
5th (not grade specific but age could go from 4 to 6 age range)
Teamwork (ESSENTIAL SKILL
)
Focus on working in groups learning how to pick complementary skills and set roles.
- Inventory Control would get parts and setup work.
- Master Builder would build the project
- Academic Assistant would fill out paperwork and follow manual (safety protocols)
- Observer would take pictures and show evidence of work.
These names can change following typical workflow for a business. Project Leader, Safety Protocol Officer, Team Lead, etc…
The focus is helping students understand how to work with others with group members rotating (groups only change for next activity if functioning if not working stay until successful with kids)
They must change roles, work with different skill sets, and different characteristics.
Teacher assigns groups and rotations in a random order. The project does not matter, the focus is working on roles. A teacher can use this format from building paper airplanes to CO2 cars.
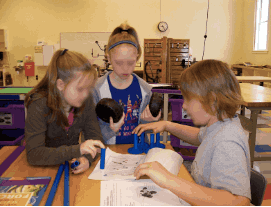
For example, my students test pulling forces using a basic car building set with a spring balance. They learn the flow of the work space, how to read basic manuals, and to record evidence. They learn how inventory control gets material, master builders get manual and builds, and academic assistants fill out paperwork while acting as an observer taking pictures of work.
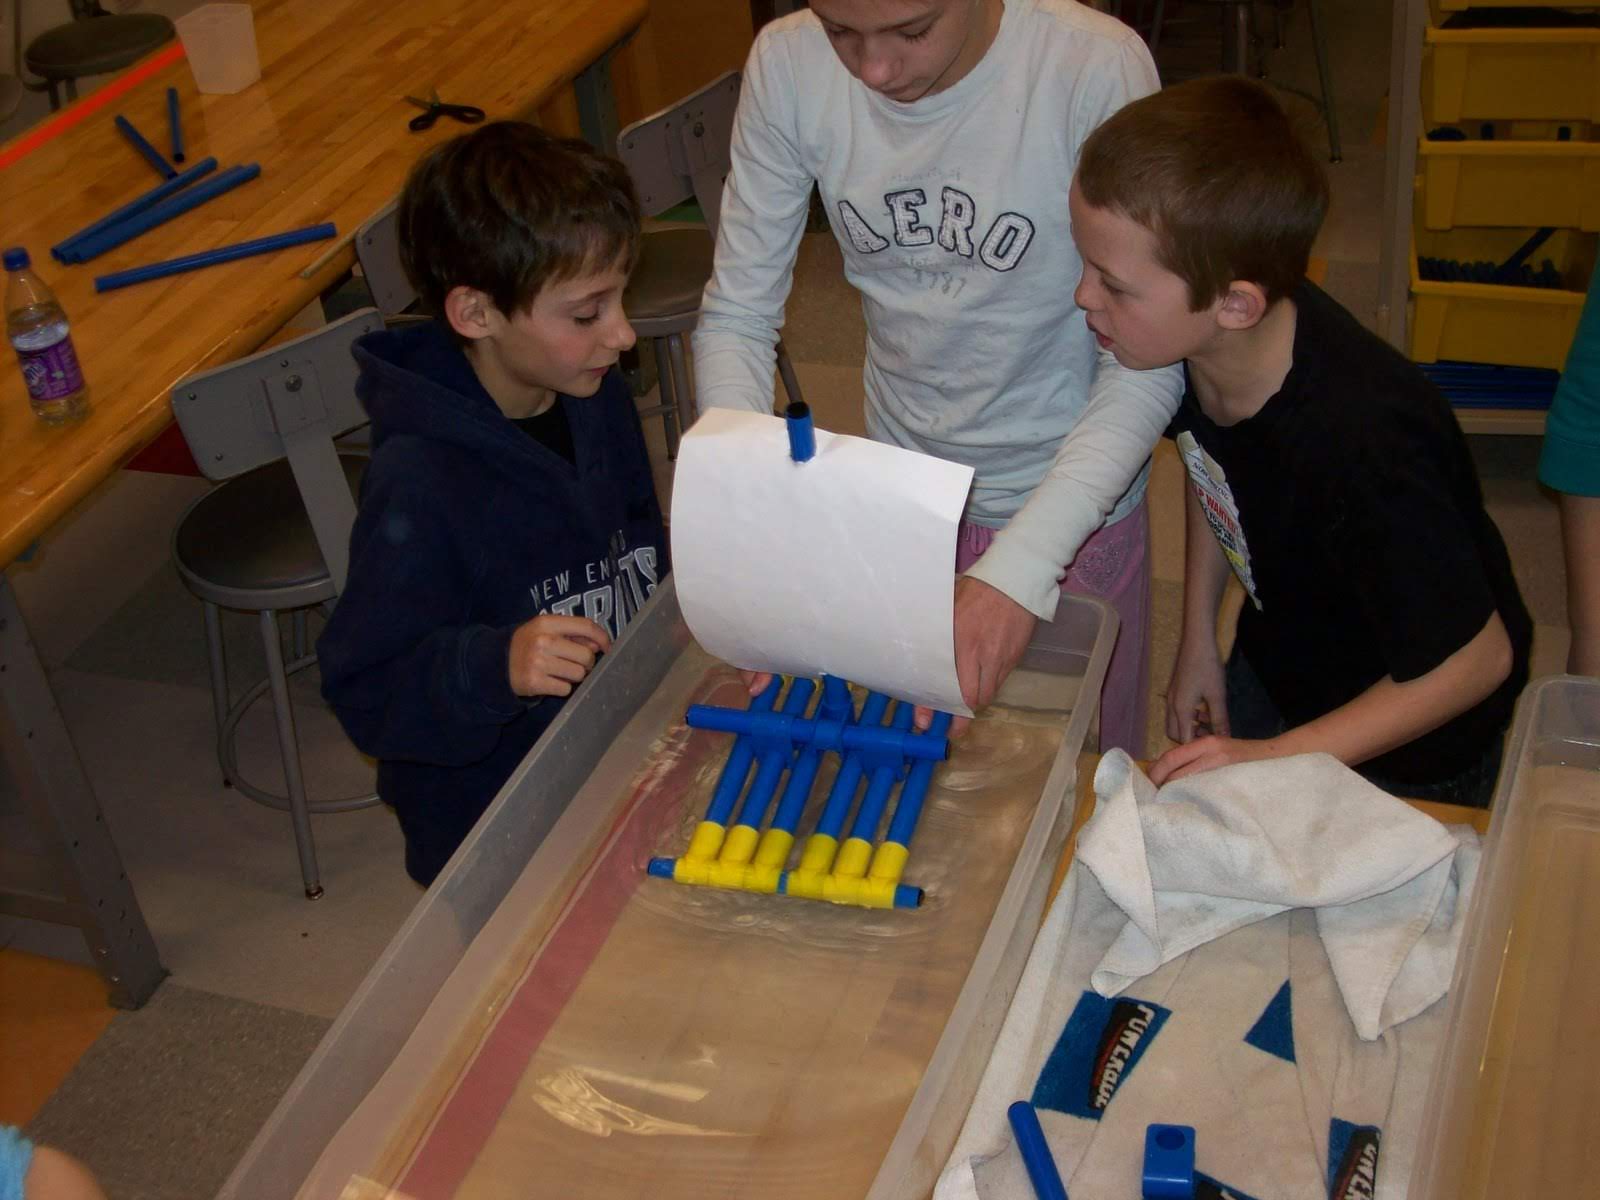
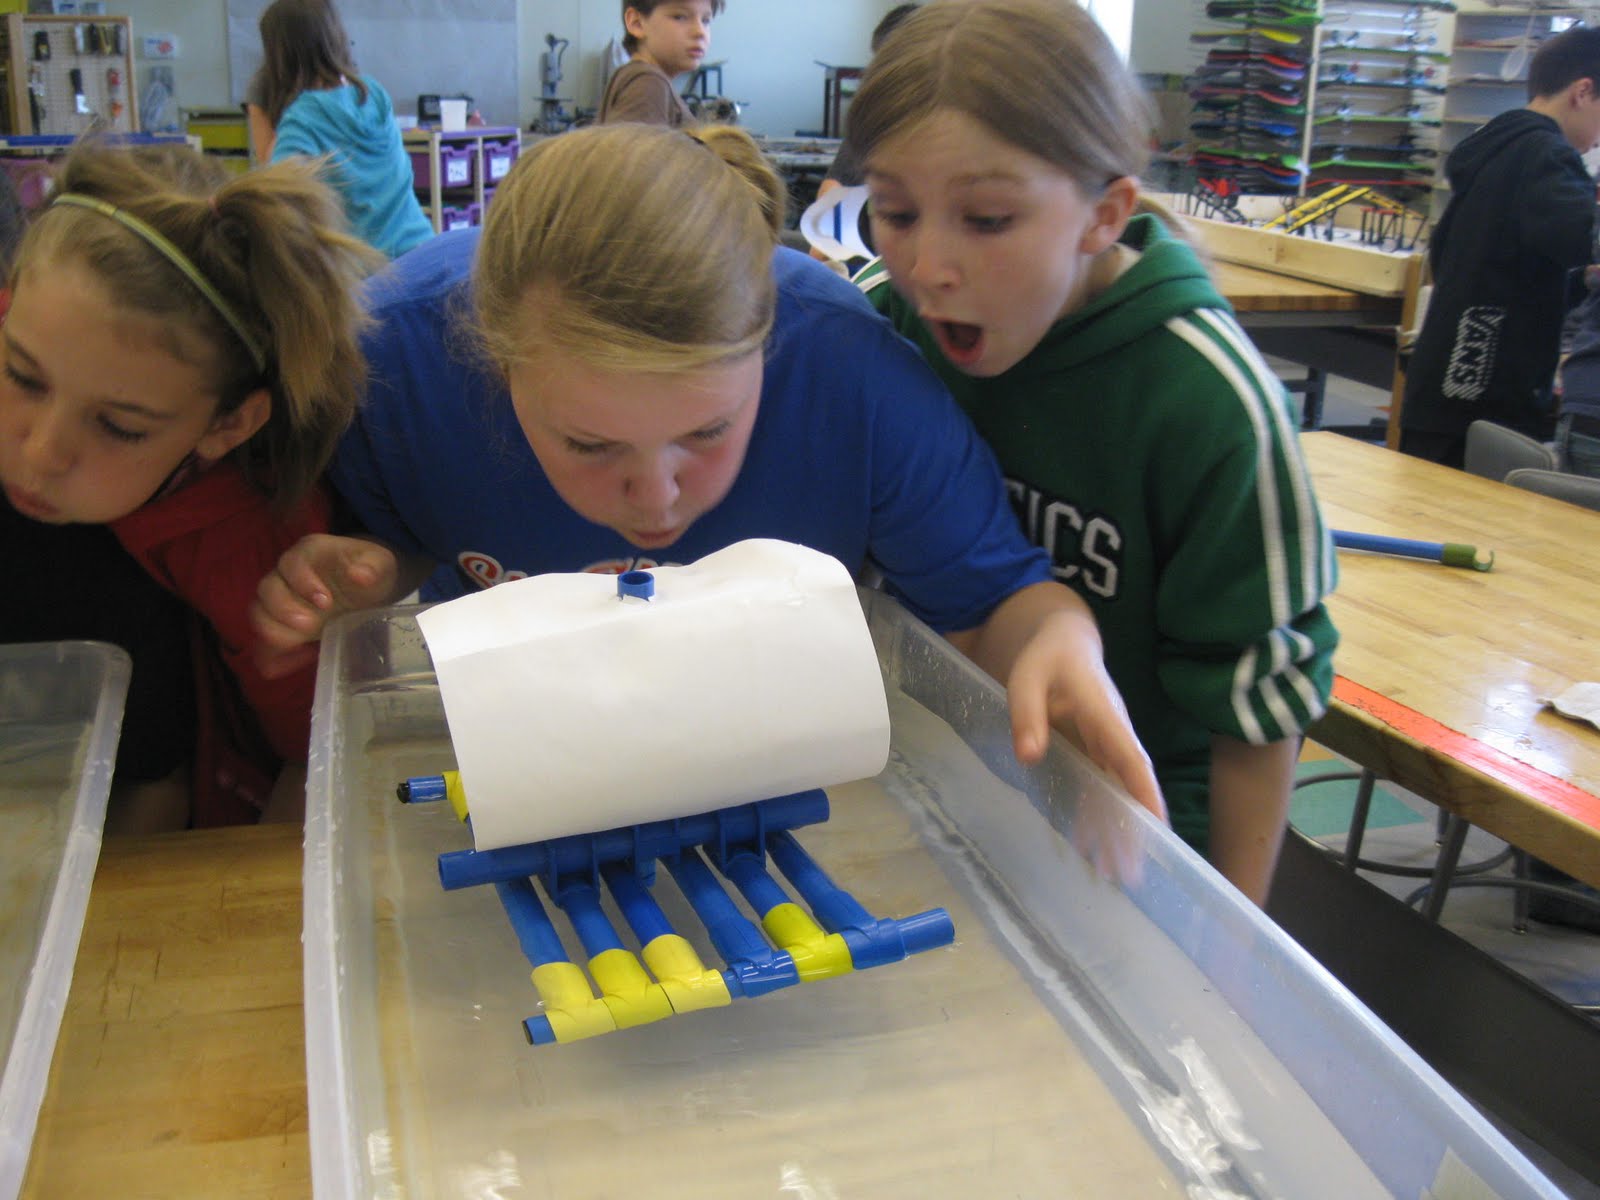
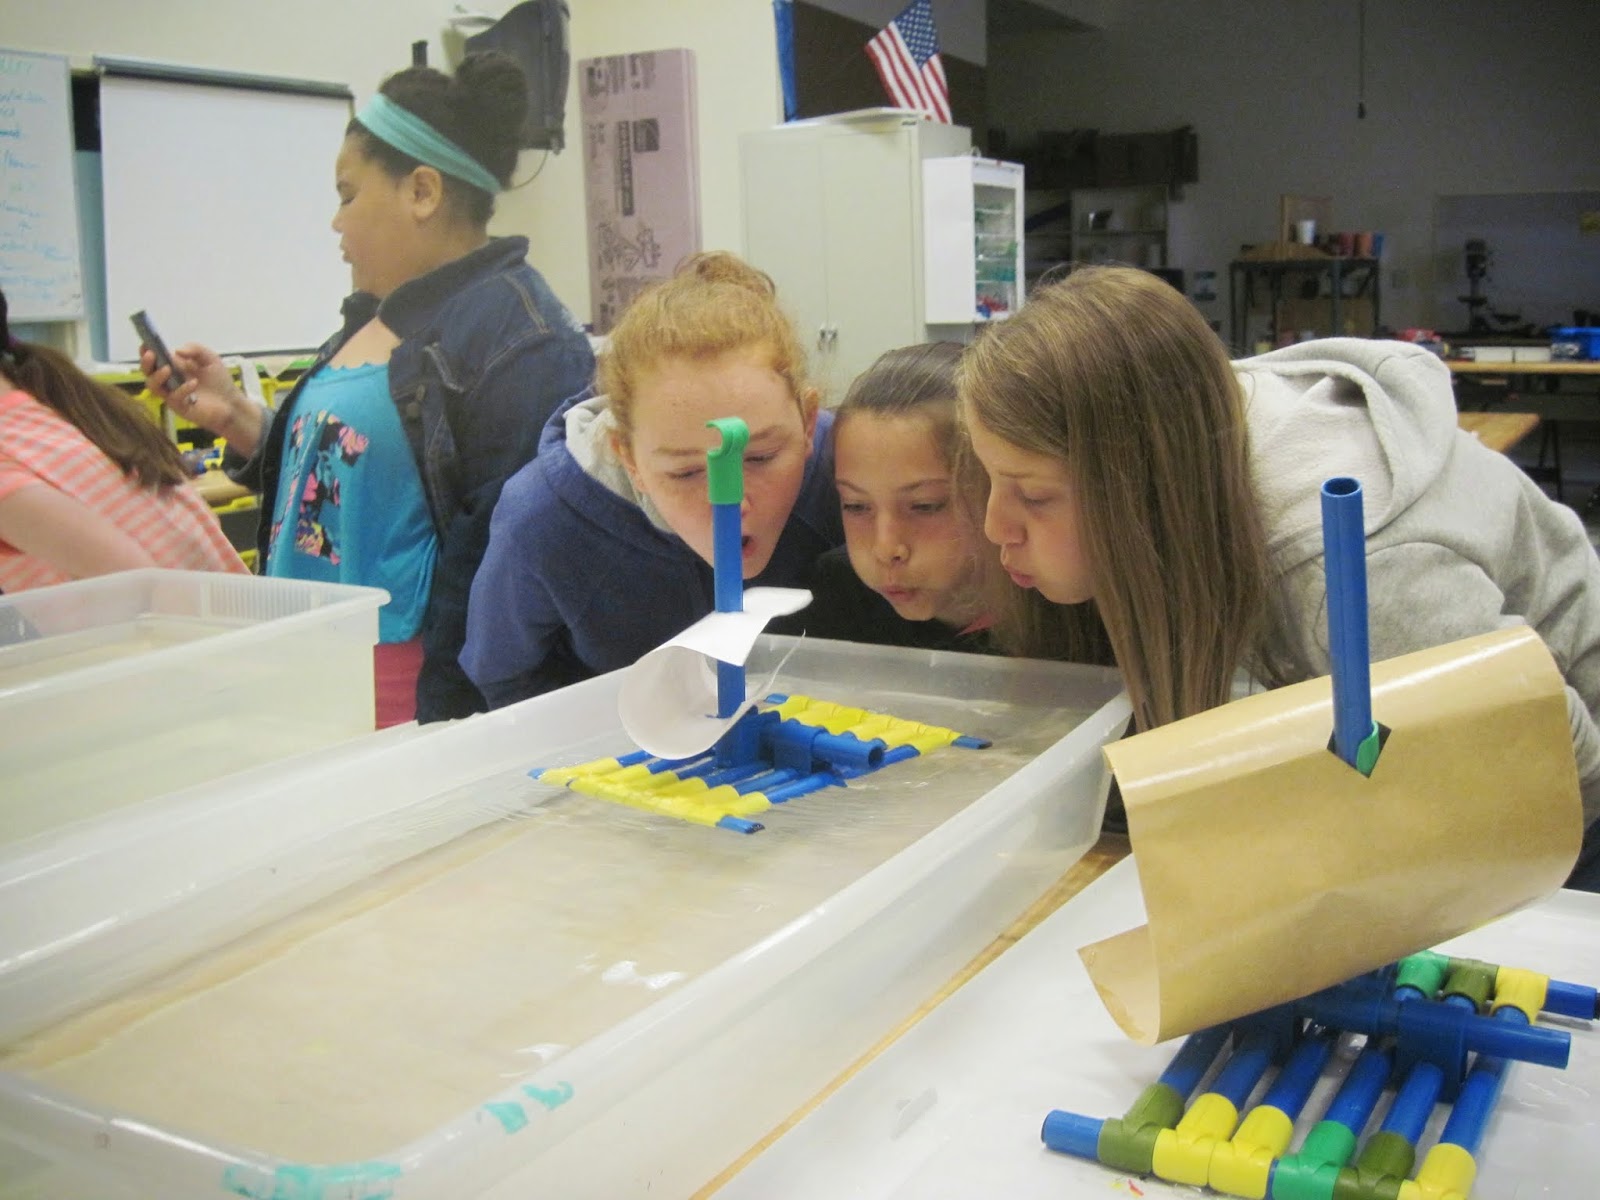
Once they do pulling force, friction and gear ratio tests (from simple machines from Science Curriculum) they then compete to build the car that can pull the most weight, compete in a demolition derby and be the fastest or slowest car. They compete against other groups in class as well as try to be top score against all other classes. They rotate for each competition to the group they worked with to do the testing. Assignment #1 is Pulling Forces, #2 Building Car, #3 Testing/Timing Gear Ratios. Once done with cars move on to boat building repeating the same process to build sail, paddle, and propellor boats. They build, test, and compete.
Advancement -
Later in older grades can add Asynchronous Groups where they are in groups but not in the same class room. Each student builds on their own using online tools (Google Drive, Docs, and Hangouts, Chat, Email) to communicate about projects without being in the same place or time from.
Learn from Successfully working together to complete and compete.
Learn from Successfully working together to complete and compete.
COLLABORATION
Teamwork
Students will learn transferable skills of Collaboration by doing group based activities. These process based projects will allow students to play different roles in a group dynamic. Roles would be a
- Project Leader (Inventory control) - Lead group by getting the parts moving work along.
- Master Builder - Using Manual/Directions build project and dismantle when complete.
- Observer (Academic Assistant) - Collecting evidence of work (worksheets, photos/video)
Students will apply their knowledge gained through experimentation to apply it to competitions.
Learn from Failure
6th (not grade specific but age could go from 6 to 8 age range)
Production (ESSENTIAL SKILL)
Focus on following directions and learning how to use tools safely by learning about manuals.
- Cutting
- Sanding
- Finishing
The specific tool is not important, but learning the safety procedure processes that are Universal from tool to tool. Furthermore, they work on understanding
- Read Manual First
- Get Help from Trainer
- Identify Base safety equipment needed (Safety Glasses for example)
- Identify Specific Safety Procedures to the Tool.
For instance, my students build skateboards by drilling, sanding, painting, and assembling them. They then apply by skating them in Gym class. The concept of failure is if they drill their board incorrectly they do not get another. If they rush the process the quality is not as good. In skateboarding you have to fall hundreds of times to get a trick down correctly. We learn how to do it safely (helmets/pads), but still need to learn.
This project could be exchanged for another. The key is picking one that has a consequence if done incorrectly. Also very difficult for teachers to understand they need to let them do projects incorrectly.
Sixth grade students work on PRODUCTION, by learning equipment safety and how to use power and hand tools. Students prepare their own skateboard project by using Drill Press, Spindle and Hand Sanders. They finish painting their decks with their design. Assembly of wheels, trucks, bearings and grip tape complete their board for them to take home. For instance, while using the power tools they learn about tensile strength, composite manufacturing, and production safety procedures.
- Science - Tensile Strength, Chemical (Paints, Poly) Properties
- Math - Scale, Measurement
- Language - Nonfiction Manual Reading and Writing.
- History - Evolution of Power Tools, Skateboard Origin
- Art - Paint decks with design and color skills
- PE - Skate decks learn proper safety and riding techniques
Advancement -
Later in older grades can add projects that incorporate more disciplines and have tolerance requirements. My students can build electric guitars where they use all the same tools, but have to solder, tune and finish a working instrument. We also add Laser Engraving and extra projects.
Learn from Failure allows them to make a mistake in a controlled environment working safely to complete a quality product they will use.
PRODUCTION
(6th Grade) Project
Students will learn transferable skills of Practical Problem Solving by building their own project. These process based projects will allow students to learn the proper way to safely use tools (power and hand) while creating a personally useful product. They will be allowed to make mistakes in a safe environment.
- Manuals - How to read and create your own for directions and safety.
- Tools - learn how to understand the setup of what safety features are universal.
- Tools - Properly used in the production of a product they use.
- Design - Allow freedom to pick their finishes and aesthetics of final product
Students will apply their knowledge by building a personal product.
Learn from Necessity
8th (not grade specific but age could go from 8 to 10 age range)
Design Process (ESSENTIAL SKILLS)
Focus on understanding the design process by creating prototypes.
- Scale
- Real to Virtual back to Real Producing
- Real World Design (make object for customer),
Necessity comes from actually needing the item they create where there is a customer involved. It is not just for a class teacher or grade. My students learn how to design in 3D creation software.
- Thingiverse
- Tinkercad
- Sketchup
- Selva3d (Drawing to 3D Model)
- 3D Printer Software (Flashforge / Makerbot / Cura / Kirimoto)
They do a Make and Take Project where they earn print time for making something for the school. A teacher’s pass, table part, etc… something they have a customer for, once made they can make something for themselves. For instance, our school lunchroom tables had broken plastic retainer parts, my students reverse engineered and created a replacement part on their 3D printer. Principal paid for extra filament for a part couldn’t have gotten. Other students created a bracket for a Double Robot Telepresence Robot for a classmate who was homebound. They saw a problem with lack of depth of the robot design when went through halls so added a t-shirt holder and a WiFi hotspot holder so she could go on field trips.
They also learn scale, XYZ axis, Subtractive vs Additive manufacturing, and manipulation of existing objects. Using Sketchup they get Google Earth Satellite photos and build their own house to scale off that image. They need to add color (roofing and siding) as well as details like Doors, Windows, Decks and the Family Car.
Advancement -
Later in older grades they can add full details to their house / architectural design. Students create products beyond replication, but re-engineer them.
Learn from Necessity makes them create objects for a purpose that will need to work.
Lesson 1 - Found Objects
Learn how to use current software to find objects already created to solve a problem.
For example, my classroom uses Black and Decker Workmate Vise Tables. These tables break the handles very easily I have my student search online to see if any objects currently exist we could print to replace them.I have them search 3D model sites like,
- Thingiverse https://www.thingiverse.com/
- Tinkercad https://www.tinkercad.com/
to find already created replacement handles https://www.thingiverse.com/thing:386388 which we print to replace.
This shows how they can not only find them, but can change the scale of objects without manipulating. I use this opportunity to demonstrate software that comes with a variety of 3D printers. *Great Advancement Opportunity to have students try examine other ideas to re-engineer them not to break. https://www.thingiverse.com/thing:18067
I use this as an example project, but there are many school based items that meets this requirement. Backpack hook for classroom chairs for instance. This is a fantastic opportunity for students to look for problems they can innovate a solution for.
- PROJECT
- Level 1 - Find Marker Holder for Whiteboard
- Level 2 - Find Replacement Parts for 3D printer (fan guards)
- Level 3 - Find Replacement Parts for Specific School Item
Software Training - Show how the 3D printer works by explaining the software.
- Makerbots https://www.makerbot.com/ Desktop
- Flashforge http://www.flashforge.com/ FlashPrint
- Openscad http://www.openscad.org/
A printer software allows a student to bring in an .stl or .obj file format 3D object. This is also the time to explain how to place on the Print Surface, what rafts and supports are. Rafts being the layer a print uses in between the plate (usually glass) and the object to help it adhere. Some machines have you use painters tape to help with this adhesion. Supports are extra print material to aid in a print that has sections that “float” without connection. An exemplar, would be a Figure standing with hands to side, the printer prints material that can be discarded later to help support that print area. We also examine the print structure with the use of the honeycomb shape internally to strengthen the object without extending print time. Print time becomes the most valuable commodity since Filament is cheap, but the time it takes to print can be long.
Students also learn about different types of filament and why they use them in different applications.
PLA being starched based is much more rigid, yet does not create fumes and is biodegradable unlike ABS which is flexible, but petroleum based. We explore other types of print materials looking at carbon fiber, metal, and rubber based printers.
Lesson 2 - Customize Objects
Learn how to use software to create your own object manipulating basic settings. In this case, name tags using Thingiverse or Tinkercad.
Students search Thingiverse for a keychain customizer https://www.thingiverse.com/thing:739573
Where they manipulate a limited set of variables (bar type, font type, line numbers, lug hole location) to create personal keychain that is printed. They learn how to load and unload the printer and change colors to create a key chain to their personal preferences. They publish and upload their work to an account to be accessed and printed at a later time.
They can use other software like Tinkercad as well
https://www.tinkercad.com/learn/#/learn/project-gallery;collectionId=O2C1PXBIQ2KHCOD
This is the place to examine the 3D printer components with the build plate, nozzle, extruder, X/Y/Z axis belts and rails. How to load and unload filament and its properties.
Show Print services to explain how if you didn’t own a 3D printer or had one that worked in material you needed you could still send out your file to be printed.
- Print a Thing https://www.thingiverse.com/apps/3d-print-with-print-a-thing
- Treat Stock https://www.thingiverse.com/apps/3d-print-with-treatstock
- Ninja Prototype https://www.thingiverse.com/apps/3d-print-with-ninjaprototype
Explain how print hubs work where they can allow others to access your printer as a print service.
- PROJECT
- Level 1 - Student Name Tag (for laptop bag or other school tool used)
- Level 2 - Teacher Pass
- Level 3 - Required Sign (for instance Occupancy Sign for school area like cafe)
This allows students to add creativity through choosing color combinations, size, hole location, thickness and other variables in their keychain. It starts the element of a customer when create a teacher pass where the instructor chooses their own colors, dimensions and text.
I recommend creating a class account in Thingiverse where students login and create their object. This is easier for printing later because you can have printer software logged into the class account so they can add the file.
Lesson 3 - Manipulate Existing Objects
Learn how to take an already existing model and make it fit your needs.
Students use a basic object already created, for example, the vise handle mentioned in previous lesson in Thingiverse https://www.thingiverse.com/thing:18067 I ask them to add a number so each table will be identifiable. I show them online editor app 3D Slash which allows them to
remove pixels from the object. Class switches to Tinkercad Tutorial so they can learn the basics of object manipulation. We use an object from Tinkercad’s Gallery as well to manipulate.
- 3D Slash https://www.thingiverse.com/apps/3d-slash-customizer
- Tinkercad https://www.tinkercad.com/
- PROJECT
- Level 1 - Manipulate Existing Object in Thingiverse (3D Slash) or Tinkercad
- Level 2 - Manipulate Existing Object Adding item (name or number)
- Level 3 - Manipulate Existing Object that must fit tolerance Fidget Cube
This is a great time to explain tolerances of items and limitations of 3D printing materials and machines. If an object has to fit over or inside a specific measurement how the printer and materials properties affect the outcome.
First allow them a chance to play and find objects they are interested in. This will grab their attention and make the work more relevant to themselves. There are a variety of objects and print projects in a school environment. For example, custodians always want door wedges or parts they use such as holders for cleaning implements.
I have students make Fidget Cubes for the Life Skills students to create manipulatives. They have to print different sizes of Cubes to see how small they can scale, yet still maintain the ability to use.
Lesson 4 - Create New Objects
Learn how to create objects that do not already exist by using measuring tools and virtual software. Go from virtual creation to a real world object that has to work and does not already exist. My students do a “Make and Take” Project where they earn print time by making a project for school. They make a pass for a teacher, or fix a part for the custodians to earn print time for their own printed project.
By this time the students know the basic editing programs so they start learning at their own pace using self-paced tutorials. I introduce Sketchup software and assign them to design their own home to scale with added 3D objects like doors, windows and other relevant items.
The Sketchup Software also allows them the chance to learn to convert to .stl files to export their project to print on 3D Printer. Introducing concept of scanners where using a laser they can scan an already existing object. Students use Selva3D to take their own drawings to take something from real to virtual then back to real.
- Sketchup My Sketchup App https://my.sketchup.com/app
- Tutorials
- 3D Warehouse
- Sketchup .stl Importer/Exporter
- Selva 3D https://www.selva3d.com/
- Next Gen Scanner http://www.nextengine.com/
Jay leno’s garage https://www.youtube.com/watch?v=7ZrJsrTT4EA
- PROJECT
- Level 1 - Create Object in Tinkercad or Sketchup
- Level 2 - Create Object in Tinkercad or Sketchup (Export and Print) for School
- Level 3 - Create Object in Tinkercad or Sketchup (Export and Print) for Sale
Different types of level one projects can be having students create a pass for the teachers at their school
Level two taking an item that needs to fix a problem for the school. For example, we had collapsible portable lunch room tables that had a metal bare held together by a plastic support brace. This would break and was not available to buy replacement, so my students made a copy they could print on a 3D printer.
Reverse Engineer an Object - Projects like this lead to students replicating an object then redesigning to fix the issue causing the problem. For instance, in fixing the lunch table problem my students added support bracing to stop the break point.
These projects also allow you the opportunity to get more material since people will pay for them or replacement material
Level 3 project is where you actually make an item that is paid for by a customer. A sample project would be like my students' Double Robot project. We have a homebound student that attends virtually using a robot to attend classes. My students noticed that her robot was not personal and being narrow where kids became comfortable would cut it off in hallways. They also saw she couldn’t come outside of the wifi range for field trips or outside activities. Using the printer they created a t-shirt and wifi holder to fix this issue. This led to the company purchasing these items from those students.
https://www.thingiverse.com/thing:1387293
https://www.youtube.com/watch?v=VuNYM0qjVyc
https://www.youtube.com/watch?v=58egIp8nClc
I also show how this tool allows them to create objects that can’t be made in a traditional way.
They can make objects with tolerances so close because they can be made all assembled. A ball already printed inside a box means there were no weak places that had to be glued or bonded. This will mean they can redesign or create new ways of making items that don’t exist today. Problem finders to become Problem solvers
Learn from Consequences
9th (not grade specific but age could go from 9 to 10 age range)
Re-Design (ESSENTIAL SKILLS)
Focus on creating an item that is value added, taking an already existing object and changings its function to create added worth.
Using prior knowledge of...
- Tool (using proper Hand & Power tool safely)
- Design Software (Virtual - 3D Design)
- Collaboration (Working with others defining work roles in group)
- Establish steps to process.
- Defining Problems
Students will search for an object they can redesign its use. For example, I gave students skateboard decks that students had to use to build with. The outcome could not be a skateboard, it had to be something beyond skateboarding. They could add other materials and parts and had to create their idea using virtually first to show the concept.
Value Added Object. My students made furniture (desks, threaded rod shelves, game chairs) or plant pots. Some made hoverboards, others reconfigured decks to be coat hangers. We then auction off the items.
Advancement -
If I give them a product that has to be made for instance, if I need a picnic table built, but make them use non-traditional materials. If they use materials using recyclables it would add value to the waste stream.
Learn from Consequences makes them re-create objects for a purpose that will need to work.
Learn from Consumer/Client
10th (not grade specific but age could go from 9 to 10 age range)
Purposeful Design - Function over Form (ESSENTIAL SKILLS)
Focus on creating an item that has to work for a customer, has to work and function not making it for school, but a functioning item to consumers specifications.
Every school has projects they need created or fixed. For example, we had a school sign that was in need of replacement. Our students recreated to Principals specification a new sign that would fit in current space, improve the design and last longer then the original. Students got commission projects that paid for materials to make signs for Conservation Trails and other sign production
We built computer labs for the school, students had to purchase, build and test to meet budget and requirements of school order. We have made other items (signs, 3D printed auto parts)
For example, one set of students made a shirt hanger for a Double Robot (Telepresence) they also made a 3D printed Wifi Hotspot holder. This had to meet the company's spec and work universally beyond just our Double Robot.
Advancement -
Have them search out projects to create in the school or community.
For example, I have a former student who uses prosthetics who recently had a daughter so students created a toy bear that would help her understand her fathers. They also created toy dolls so young girls with artificial limbs can have one that looks like them.
Learn from Consumer/Client - Built a functioning project that a consumer wants.
Focus on creating an item that has to meet working tolerances, has to function rather than making it for school, but a working piece.
Using prior knowledge of...
- Tool (using proper Hand & Power tool safely)
- Design Software (Virtual - 3D Design)
- Collaboration (Working with others defining work roles in group)
- Establish steps to process.
- Defining Problems